8.30.2011

Back-to-School Girly Backpack

I am jumping for joy and excited!
Do you know why?
School has started and I can get back to making stuff and blogging!
YAY!
Are any of you taking a big sigh of relief at having a moment to even think, let alone get things back into a normal rhythm?
I hope you are! Even those of you with first time little ones out the door - the sad "my little one is already going to school" moment will pass.
I promise.

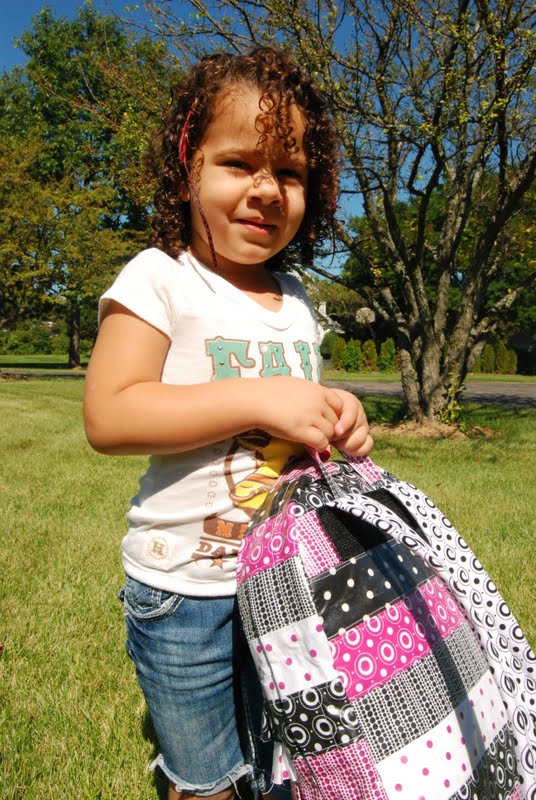
So, little AuBrynne hopped on the bus to her first day of Pre-K class at our local elementary.
And she does this without hesitant! She doesn't even meed me!
I knew this would be the case, as she had been asking me for 93 straight days, when she could go back to school.
When we were getting her school supplies ready, the list called for a "large backpack".
Ok. Cool. Until you start looking for one and you have basically two options:
-the dreaded obnoxious character plastered all over; or
-cute, but priced way out of budget.

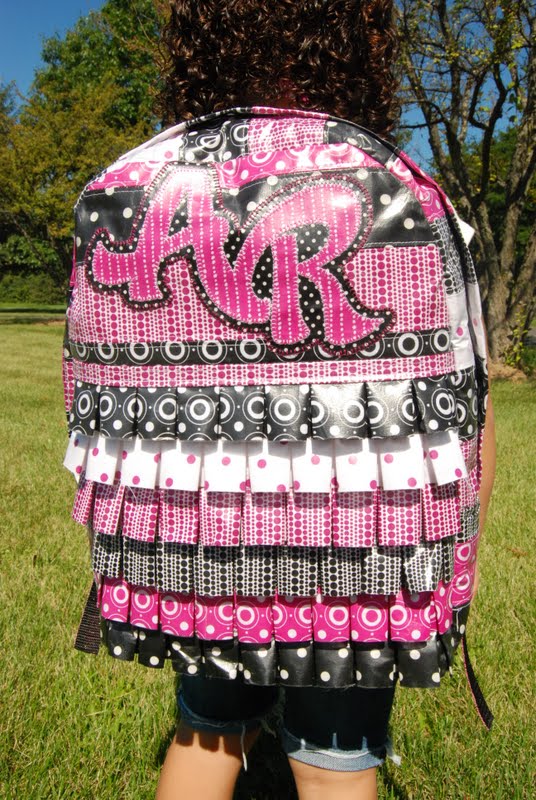
So, I decided that I could make a backpack with super cute fabrics and some iron on vinyl.
So, I did.
I found some cute fat quarter packs that little AuBrynne LOVED, and melted the iron on vinyl to all but one of the fat quarter pieces. 
Then I cut them in to three inch strips and sewed them all together into one piece and then top-stitched all the seams open.
After all that, I cut all the pieces of the backpack out and assembled it.
For the back, I sandwiched cushioning between the outside and the lining and then quilted the piece.
I also left the straps without the vinyl coating and also made them super cushioned for comfort.
The applique was done with two pieces that I cut with my Silhouette SD and a 60° blade.
I layered them together and used a blanket stitch on my machine to go around all of the edges.

I think it all turned out super cute!
And AuBrynne loves it!


The bus comes RIGHT at lunch time, so she finished as she waited ♥

Have you visited my Linky-Party Directory?
I like to link my projects up on all the places there!
If your linky party is not listed because I have not linked there, or maybe don't know about it
Please Feel Free To Add It! :)
Blog Signature

8.25.2011

Making It With Allie Featured Blogger: Maureen from Release Me Create

Welcome!
Today I am super excited to bring you a guest post from the adorable
Maureen from Release Me Create
If you haven't been over there, you should have a visit, it's fun!
And drop her a comment to say for me too!

Not only has she wrote a great post for you today,
she is also including a giveaway with her guest post!

Scroll down after her post to see how to enter!


Hello Everyone!
My name is Maureen and I live over at Release Me Create.
I'm so very excited and honored to be guest posting with you today on Allie Makes!
Today I'm going show you how to make this cute little dangling column shelf:
So, lets get started.

WHAT YOU WILL NEED:
4' Board (Not too thick, I used some sort of cheap panelling that I found in the Home Depot bargain bin)
1/2" PVC Pipe
PVC Pipe Cutter Thingy
1/4" rope
Drill
Saw (Mechanical or Handheld)
Wall Hook
White Spray Paint

First, I cut my 4' board into 1' pieces (Okay, I had my husband cut them for me with his circular saw...I am not to be trusted with sharp objects). I spray painted them, let them dry, and then drilled a hold in each corner of one piece.
Next I cut my PVC pipe and cut it into 1' pieces using my husbands handy dandy PVC Pipe cutter thingy.
The pipes have writing on them to indicate size and type, so I had to spray paint those too. Here is my setup behind our shed for painting them without them rolling around.  I just strung them onto the string and tied it up on both sides.
After they were dry I began assembling the shelf. I threaded the rope through the bottom hole on on one of the boards and I tied a knot in the end of the rope so it would not pull through.
Then, I slid one of my PVC pipes onto the rope.
I did that same process for all of the holes, and just started stacking them together:
As you can see, the project overseer was close by, making sure everything was going smoothly:
I installed the hanging hook into the wall, tied up the ropes at the top making sure everything was even, and VOILA:

Now I just need to make one more for the other side of the fireplace.  And then the next project is to paint the mantle white to match the shelves.  I'm still trying to win that chess match with my husband, but he will cave and I shall have my white mantle :)
I hope you enjoyed it!
I would love to see what you make with this tutorial!  Feel free to customize it and make it your own  Just pop on over to Release Me Create to show me what you do!!
MyFreeCopyright.com Registered & Protected


Thank You Maureen!
The hanging shelves are fabulous!

Maureen is also feeling so generous, she is going to give one lucky follower a piece of her adorable jewelry from her store!
She has some really fantastic items there!
Check out this adorable necklace she is offering up!


So, I can hear you asking:
How do I win??

It is very simple!
1: Be a follower of both Release Me Create and also AllieMakes!
2: Leave us each a comment telling us that you are a follower
Do this by Wednesday, August 31st
Winner Announced September 1st


So, go on! link up your projects and leave us a comment to enter to win!

Welcome to the
Making It With Allie Party!
What have you got this week?
I am anxious to see!
You all are SO inspiring, I can't wait!
So, grab a button (below) or a text link is fine too.
Follow along if you like what you see.
I want to visit all of your links,
so link up your direct post, not your main blog page!
 Feel free to link up as many links as you would like,
let's just make sure they are not just pages to sell product...
And visit some of the others and share some comment love!
Party Button
 

If you have issues linking your post, feel free to email me and I can add it directly :)


Blog Signature

8.18.2011

Making It With Allie

 Hello friends!
We are feverishly getting ready for school around here!
And I have been terrible about taking pictures.
And I have several projects that are 90% finished.
So, you will all have to party without me!
I will be back soon!
but please join the
Making It With Allie Party!
What have you got this week?
I am anxious to see!
You all are SO inspiring, I can't wait!
So, grab a button (below) or a text link is fine too.
Follow along if you like what you see.
I want to visit all of your links,
so link up your direct post, not your main blog page!
 Feel free to link up as many links as you would like,
let's just make sure they are not just pages to sell product...
And visit some of the others and share some comment love!
Party Button
 

If you have issues linking your post, feel free to email me and I can add it directly :)


Blog Signature

8.11.2011

Making It With Allie - Picture Day

Hello friends!
Yesterday was Picture Day for Miss AuBrynne!
And had I not been an admitted fabric-hoarder, this post likely would have been a letter of complaint to the fabric manufacturers. You see I am more disappointed than usual at the lack of color and print fashion forwardness.  But, you see, I came home (after 2 long days of fabric store hunting) and got into my stash. And friends, I found a cute striped knit with pinks and oranges and reds and purples.
For the little girl who is loving Strawberry Shortcake right now, I thought this would be perfect.
So, I threw together this little asymmetric little play dress.


You know she had to add her own touch: A headband I made her recently for a BRACELET...


So, I get it finished, and the little thing says to me:
Are we finished? Cuz I'm not wearing this tomorrow...
I suppose I shouldn't be so stunned when she mirrors my sass.
But I AM!
She did decide it was cute enough to wear for pictures.
So, I guess I wont complain, for now.

 Now, it's time for the
Making It With Allie Party!
What have you got this week?
I am anxious to see!
You all are SO inspiring, I can't wait!
So, grab a button (below) or a text link is fine too.
Follow along if you like what you see.
I want to visit all of your links,
so link up your direct post, not your main blog page!
 Feel free to link up as many links as you would like,
let's just make sure they are not just pages to sell product...
And visit some of the others and share some comment love!
Party Button
 

If you have issues linking your post, feel free to email me and I can add it directly :)


Blog Signature

8.04.2011

Making It With Allie

Making It With Allie Party!
What have you got this week?
I am anxious to see!
You all are SO inspiring, I can't wait!
So, grab a button (below) or a text link is fine too.
Follow along if you like what you see.
I want to visit all of your links,
so link up your direct post, not your main blog page!
 Feel free to link up as many links as you would like,
let's just make sure they are not just pages to sell product...
And visit some of the others and share some comment love!
Party Button
 

If you have issues linking your post, feel free to email me and I can add it directly :)


Blog Signature

Labels