

A little closer:


When people saw this creation, the conversation went like this (over and over again):
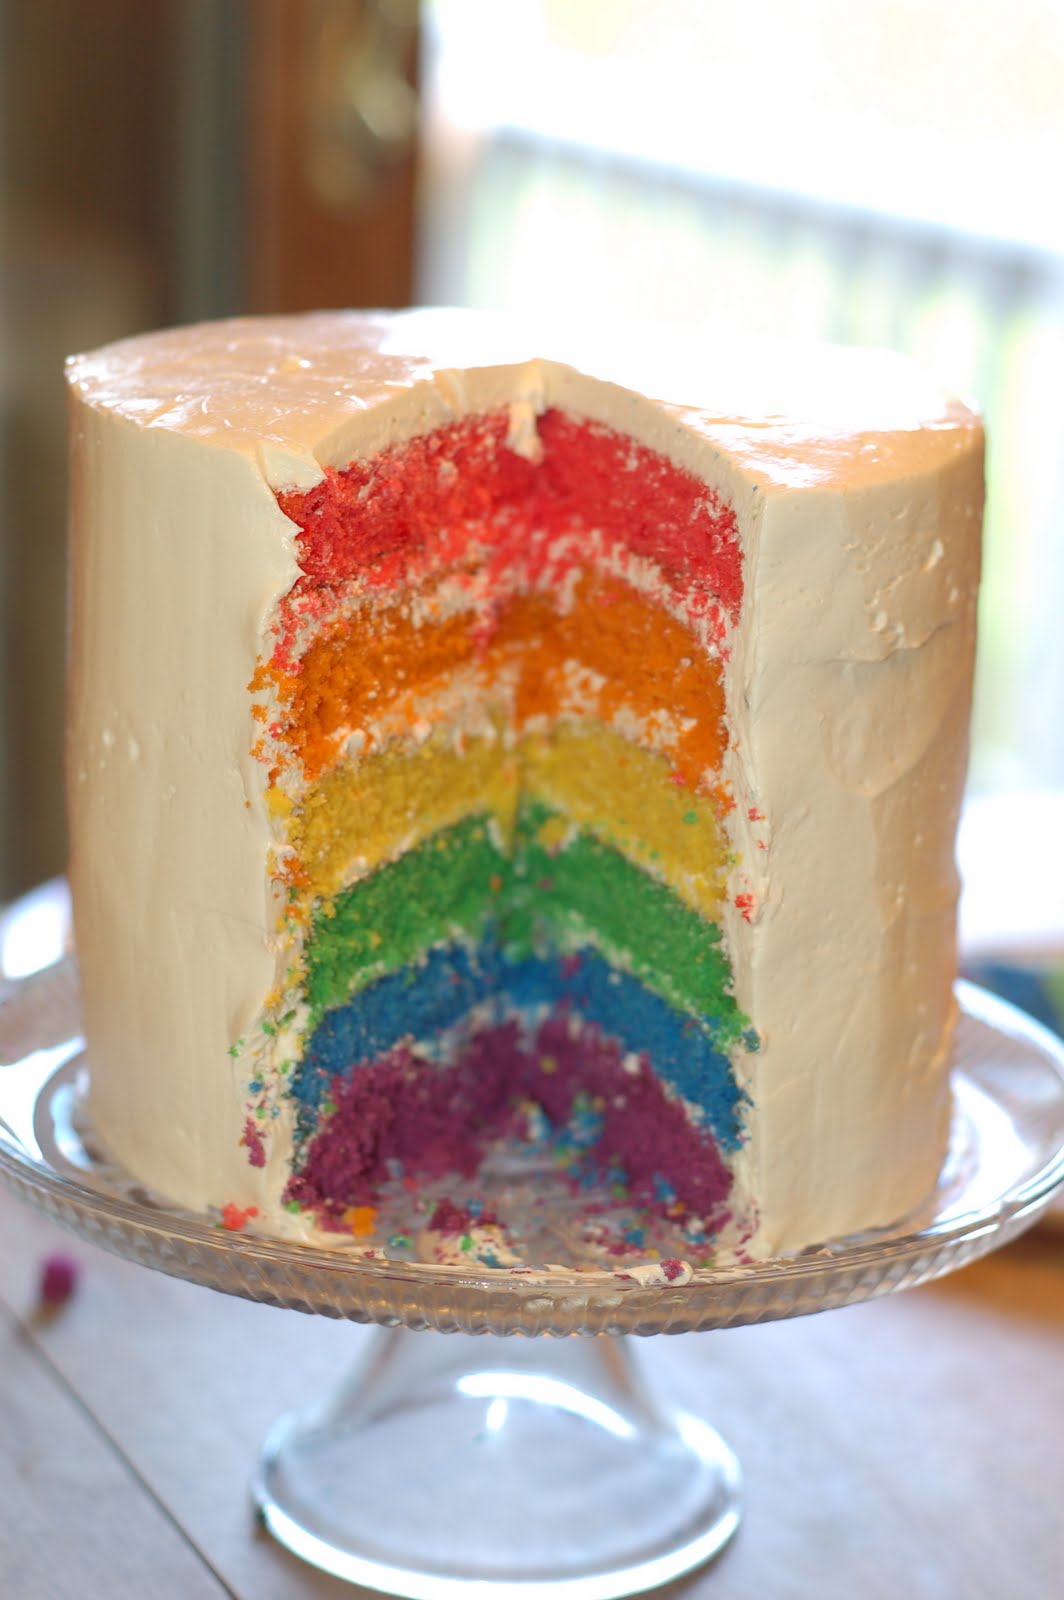
Guest: How many layers is THAT?!
Me: . . .(blank stare... coy grin)
Guest: What kind of cake is it?
Me: . . .Huh?
Guest: Ha Ha! I'm not gonna get an answer am I?
Me: How was your drive up?
That pretty well built up some suspense until it was time to let people dive into it. People actually gathered around to see what was in this thing! And when they did! There was actually a few shrieks! Nobody has ever shrieked when I cut a cake before... Anyways, here it is, blow by blow. I hope if you feel the urge to shriek, please do!


How does one plate a slice of cake of this magnitude? Very carefully! At first I tried a pie server and knife. It did the job if that was all you have. But what worked ultimately, was two long knives. It worked best like this:


So, here is the recipe for the Ultimate Rainbow Cake:
White Cake (Soon to be Rainbow Cake)
4 sticks Unsalted butter, soft, but still cool
4 2/3 cups sugar
10 egg whites
4 teaspoons vanilla
6 cups flour
8 teaspoons baking powder
1 tsp salt
3 cups milk
Red, orange, yellow, green, blue and purple food coloring. I like the Wilton colors, but didn’t have every color and the regular liquid ones worked just fine.
Preheat the oven to 350F degrees.
With a pastry brush, brush softened butter onto your 9 inch cake pans, they dust with powdered sugar, lay your parchment paper round into each pan. If you do not have 6 pans, divide this recipe by however many pans you do have.
Mix together the flour, baking powder and salt. Set aside.
Cream the sugar and butter with whisk attachment until the mixture lightens and become fluffy. Depending on how soft your butter is this will take anywhere from 3 to 7 minutes.
Add the egg whites one at a time. (But crack them into a bowl first so you don’t accidentally drop a yolk in) Add the vanilla and mix until fully incorporated.
Add, alternating, the flour mixture and the milk in 3 equal-ish additions.
Into six separate bowls, scoop two cups of batter each, making sure to use a spatula to get every last bit of batter into each bowl. Add your food coloring to each bowl and mix until you achieve the desired intensity you like. I wanted vibrant, so I added a little bit more than I thought necessary, which turned out to be a good thing.
When all is mixed (try not to over-mix so that you don’t make your cake tough); put your colored batters into each pan and deliver to the oven for 30 minutes. Depending on your oven, the time will vary, but the cake is done when it pulls from the sides and the center is firm, not jiggly.
Remove them from the oven, to a cooling rack in the pan until you can safely flip the cakes out. At this point, I flip the cakes every 20 minutes until they are cool, removing the parchment but not discarding it until you are ready to assemble your cake. If you choose to assemble your cake longer than several hours after they are cool, wrap them tightly in plastic wrap on the counter (up to 12 hours). More than that, refrigerate
Swiss Meringue Butter cream frosting (Allie’s Version)
10 large egg whites
2 ½ cups sugar
2 teaspoons Cream of Tartar
8 sticks unsalted butter, softened but still cool to the touch
2 teaspoons pure vanilla extract
(I did this in my Kitchenaid stand mixer’s stainless steel bowl)
Start a sauce pot of water to simmer on the stove. Place your bowl with sugar, egg whites and cream of tartar over simmering water. Whisk mixture constantly until the sugar is dissolved and a candy thermometer reads 140 degrees.
Remove and immediately transfer to stand mixer and whisk on medium. Let mixer mix until the bottom of the bowl cools to room temp. This may take more than 10 or fifteen minutes. At this point, the mixture will look like super silky marshmallow.
When you have a nice stiff mixture slow the mixing speed to medium low. Begin adding your butter, tablespoon at a time, making sure to let the butter incorporate fully before adding the next. It will make it look soupy for a bit then for a few moments near the end of adding it all in, it will look curdled. But it will smooth itself out and actually get light and fluffy! Add vanilla and whisk until just incorporated.
LOVE LOVE LOVE this cake! I am so happy to have met you! My husband is now obsessed with that buttercream frosting... I'll have to get practicing.
ReplyDeleteI'm so glad you were able to come ! We should get together sometime soon. The Buttercream is actually WAY simple. It's really a matter of technique. I'm a stickler for technique... And NOT using salted butter. I tried it late the night before because we ran out of unsalted. It's not ok. Maybe for these salted hot chocolate confections. But not for cake.
ReplyDeletethe cake loose delicious
ReplyDeleteMy jaw is dropped. I've never, ever seen a cake like this in all my life!! How CUTE!!
ReplyDeleteAnd the pictures are amazing!